Battle Report - Resistance vs Scourge, Targets of Opportunity, ~1K pts
2021-07-31
Battle Report /
DZC Resistance /
DZC Scourge /
Dropzone Commander /
10mm-SF /
Autumn of 2669, Scourge Occupied planet Elysium Prime, Granum city.
The clouds are achurn with crackles and thumps of violence in the upper atmosphere. Another Shaltari raid, looking to count coup, their bizarre honor driving them to these pointless dogfights. Sunlight breaks through a hole in the sky and you can taste the ozone spike as something ionic goes off. Makes your teeth tingle a bit too, and the radios all crackle and pop.
We've got the blast doors pulled shut, the aerials collapsed, everyone hunkering to stay out of the squabble. Birds are gassed up but cold, one of those bastards comes down nearby, we gotta sound the general evac for the civvies, go make some noise and start the fight somewhere a bit more expendable.
I'm about to sound the all-clear when every damn alarm in the radio hut goes off, the instruments lighting up and squawking that Something is popping off... but not in the air? We're checking whatever that was hasn't fried our kit when a bike screeches up outside, a scout dashes in, yelling about not being informed about the distraction by the park. What distraction? That ain't us.
A lookout from the roof garden races down to say we've got a bogie flying low, no signature but visual, whisper quiet too, heading away from whatever that was. I grab the copper line back to HQ and call it in. We've got neighbors it looks like. Time to go introduce ourselves.
Setup
Classic 'Targets of Opportunity' scenario, with 3 Objectives along the midline, and 2 on opposite quarter lines. Objectives represent UCM wild weasel ECM equipment prematurely triggered by a stray spray of Shaltari microwave fire, though neither force knows that yet, simply that something unusual is happening in what has otherwise been a complacent area of the planet.
Warlord Malikir's Stikeforce
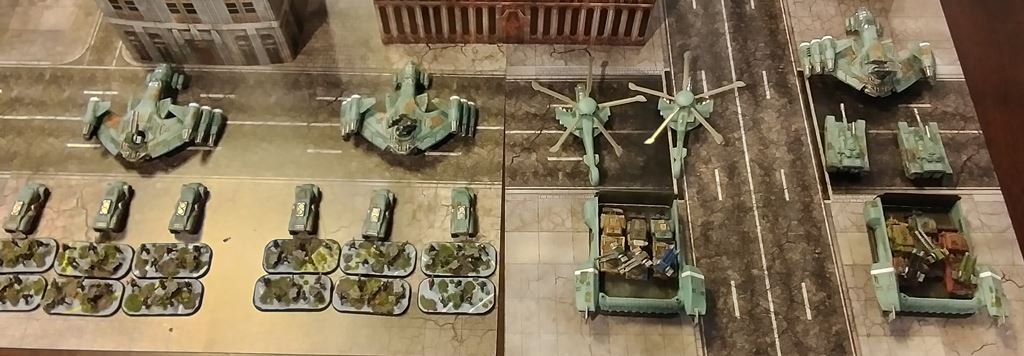
AT-77 Lifthawk Dropship carrying 3 AT-90 Jackson APCs each carrying a squad of 2 units of Resistance Fighters

AT-77 Lifthawk Dropship carrying 3 AT-90 Jackson APCs each carrying a squad of 2 units of Resistance Fighters

NT-1 Kraken LCAC carrying a squad of 3 AA Gun Wagons
1 squad of 2 AH-16 Cyclone Attack Helicopters

NT-1 Kraken LCAC carrying a squad of 3 AA Gun Wagons
AT-77 Lifthawk Dropship carrying a squad of 2 M-9 Hannibal MBTs
Scourge Occupation Forces
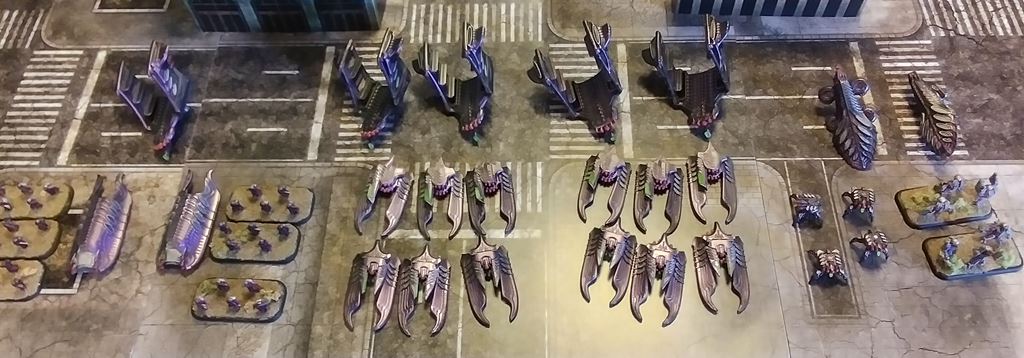
Maruder Medium Dropship carrying 2 Invader Grav-APCs each carrying a squad of 3 units of Scourge Warriors

Marauder Medium Dropship carrying a squad of 3 Hunter Grav-MBTs
Marauder Medium Dropship carrying a squad of 3 Reaper AA-Gravtanks

Marauder Medium Dropship carrying a squad of 3 Hunter Grav-MBTs
Marauder Medium Dropship carrying a squad of 3 Reaper AA-Gravtanks

Intruder Light Dropship carrying a squad of 4 Prowler Light Walkers
Intruder Infantry Dropship carrying a squad of 2 Destroyer Heavy Infantry
Turn 1
Turn 1 of the game is almost entirely positioning, so I'm skipping to what the board looked like top of T2.
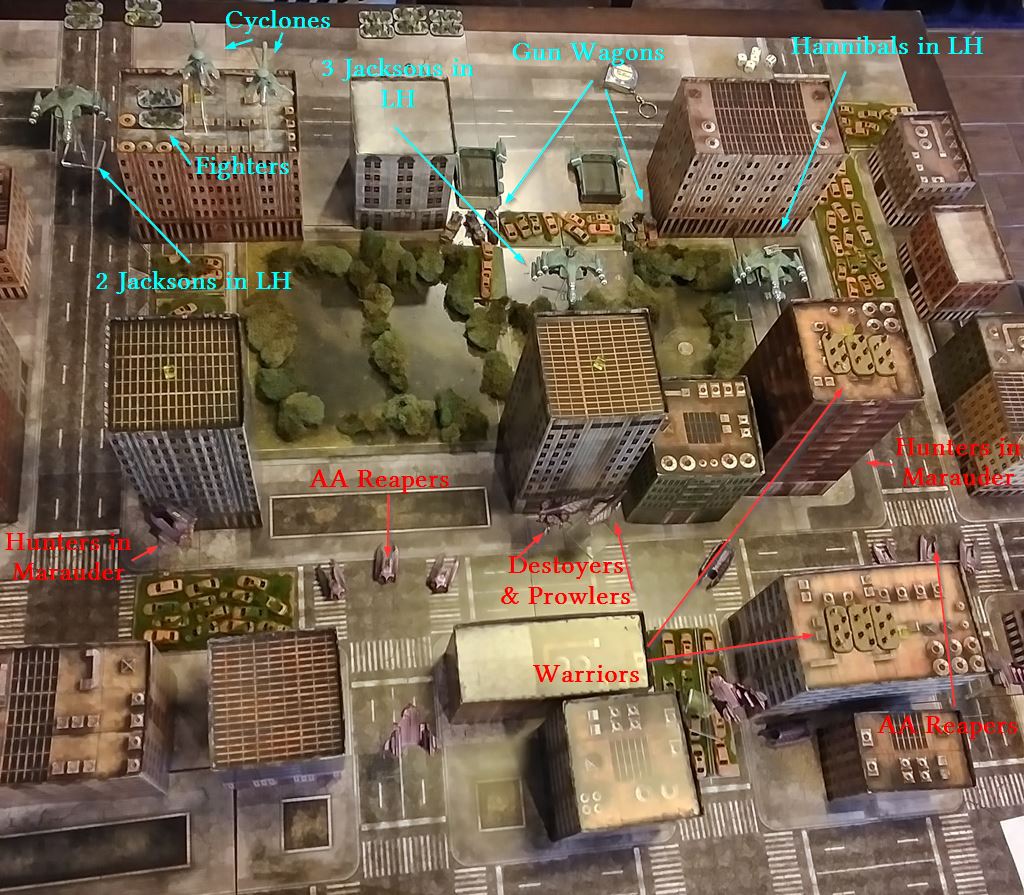
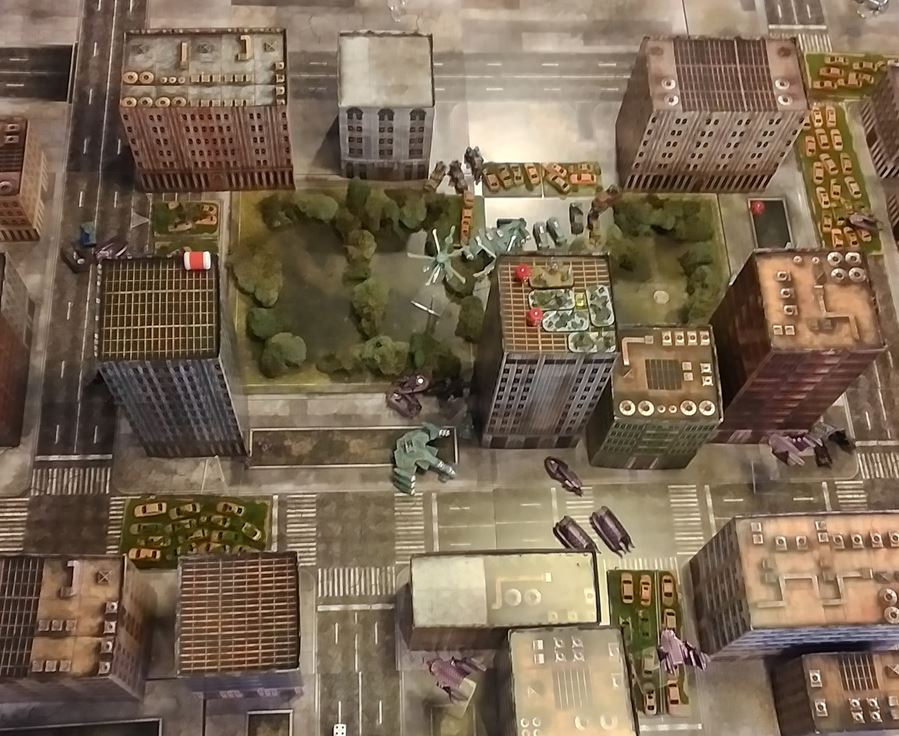
Resistance have made a nest of AA Gun Wagons behind the overgrown park (treated like a forest with multiple areas) in the middle, sent the Hannibals MBTs down the East corridor, AH-16 Cyclone helicopters forward but out of range of the Reapers. Infantry platoons are moving deep middle and stopping to drop off a team in the near side objective building down the West corridor.
Scourge have deployed both Reaper AA squads, and moved deeper with the Hunter grav-tanks. Warrior platoon is in the near side and Eastern-middle objective buildings (later, we realize something was mismeasured and the second squad shouldn't have been able to get into that building so soon). Prowlers and Destroyers drive deep into the middle to counterattack where needed.
Turn 2
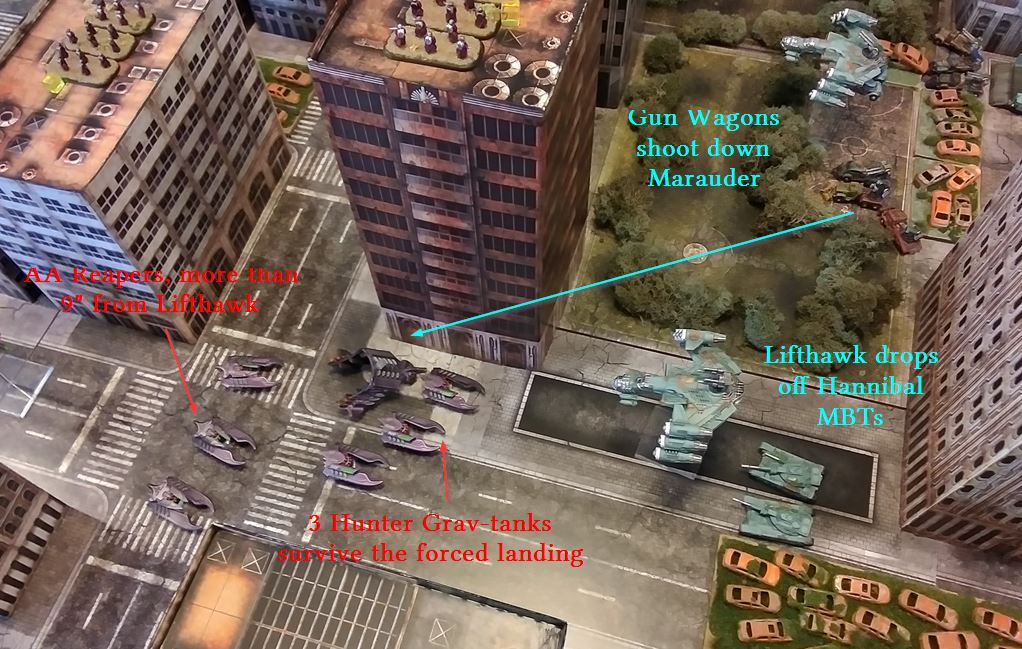
Turn 2 Eastern corridor is first blood, with one squad of Gun Wagons shooting down a Marauder (forced to land and disabled, cargo not destroyed) while the Lifthawk drops off the MBTs out of range of the Reapers, but foolishly sticks around to take out a Hunter grav-tank, which the Reapers repay by shooting it down.
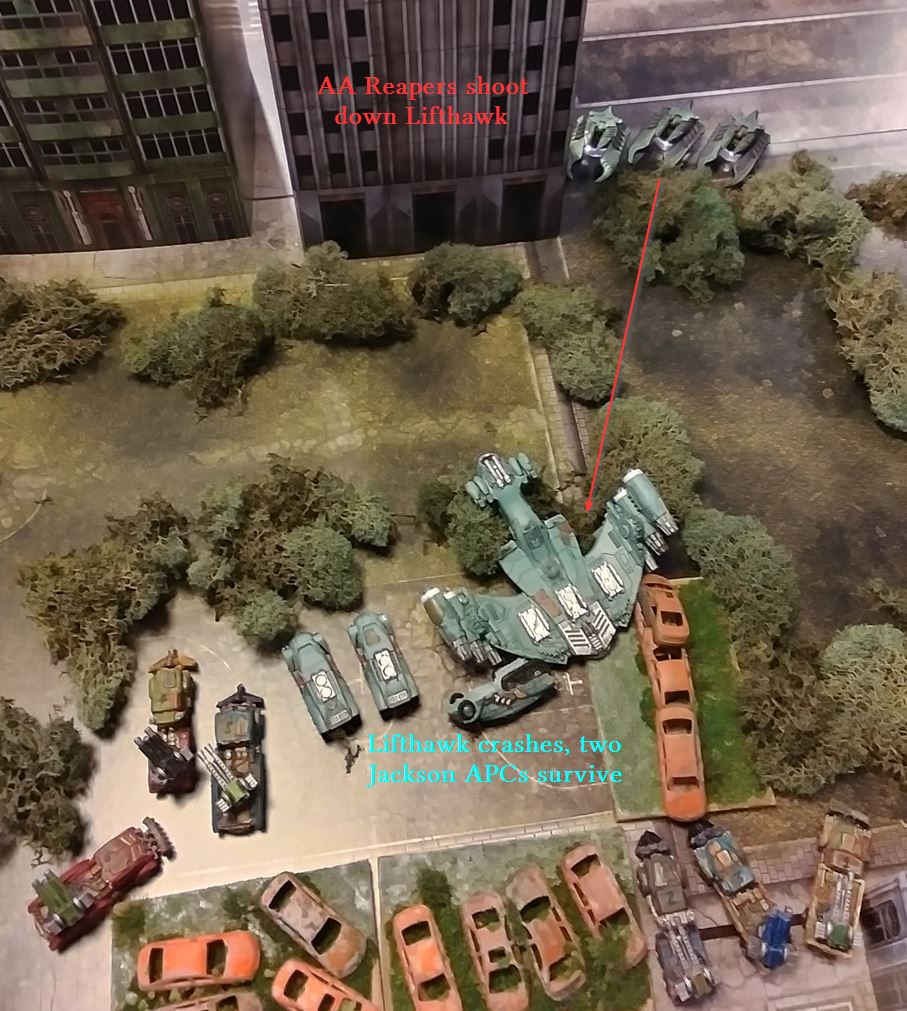
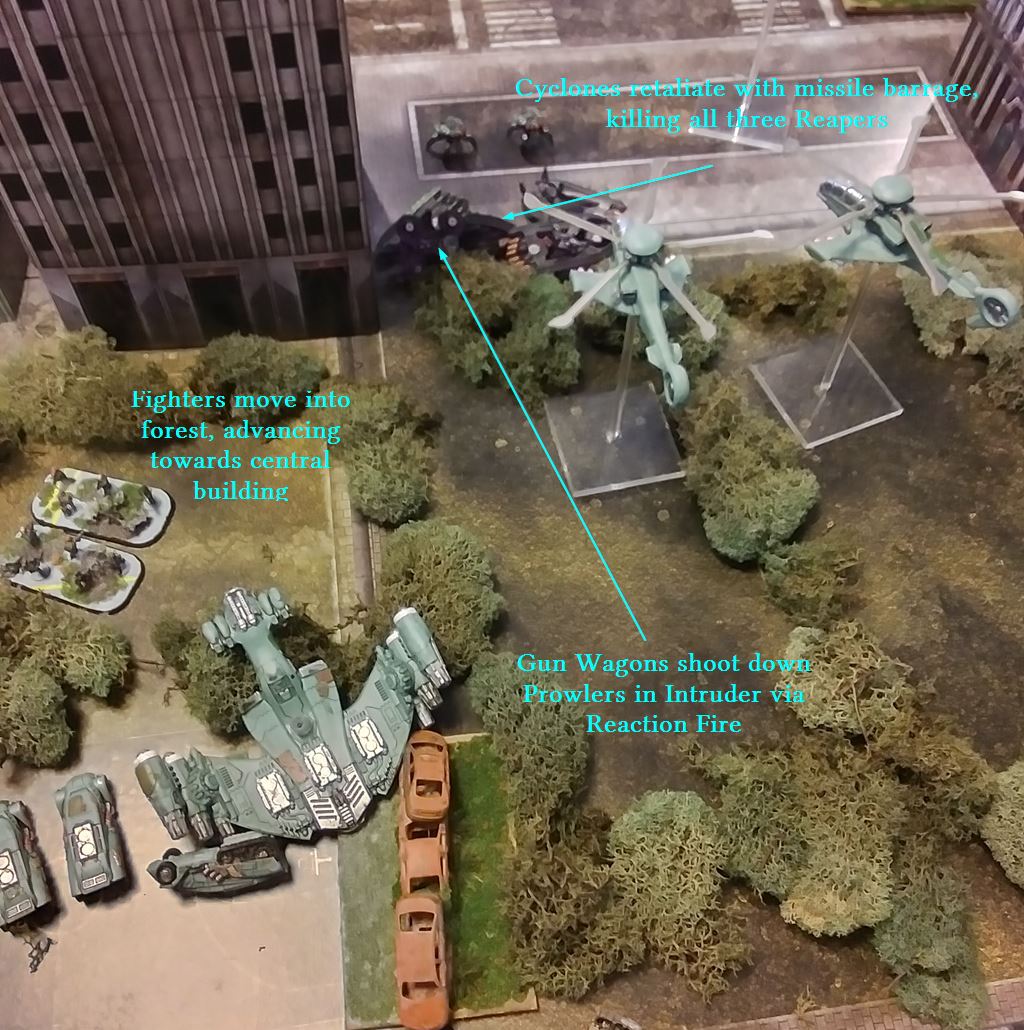
Mid-table, the Reapers are just barely able to get in range of the fully loaded Lifthawk and again shoot it down. It crashes, destroying one Jackson and all its cargo. But this leaves the Reapers clumped up, which the AH-16 Cyclones capitalize on, firing their barrage of Hornet missiles and Beowulf pylon missiles, wiping out the squad entirely. The scourge make a mad dash hoping to drop the Prowler amidst the Gun Wagons, but even with Reaction Fire penalties, they thoroughly destroy the light dropship, with only two Prowlers crawling from the wreckage intact.
The surviving Resistance APCs unload, with the Fighters moving through the forest cover towards the middle buildings. The Destroyers enter the central objective building, in order to defend the walls and force them to spend another turn entering via the adjacent building as opposed to directly from the forest.
Western corridor sees the Hunters unload and move forward, not to attack but to block the Lifthawk from dropping off any more APCs.
Turn 3
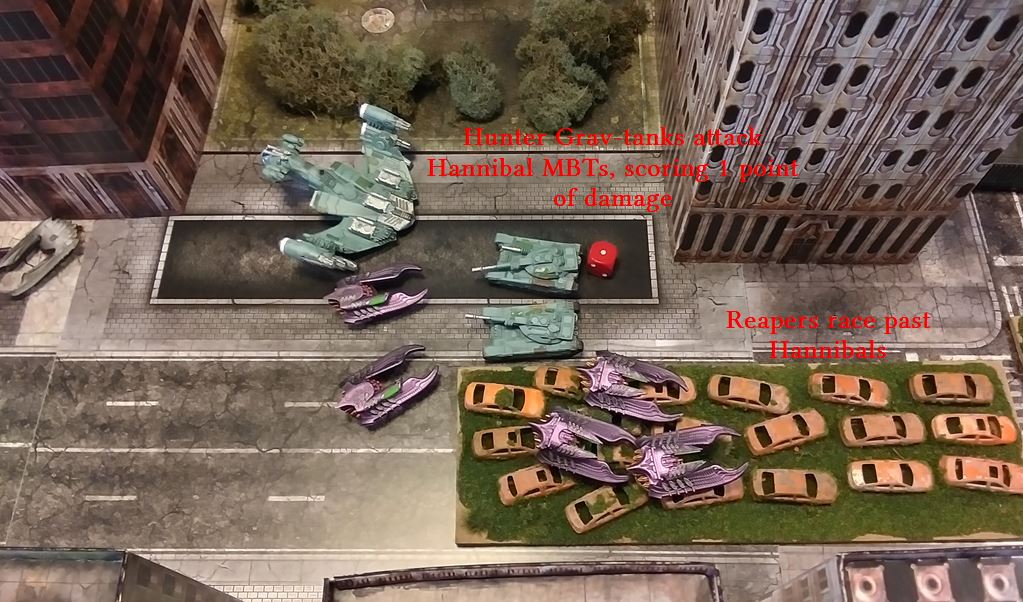
Turn 3 Eastern corridor proves the durability of the Hannibals as the Hunters are only able to scratch one tank, and the Reapers race past hoping to get between the last Lifthawk and prevent rapid extraction.
Western corridor sees the Hunters wiped out from another combined volley of the Cyclone missiles, though their pylons are empty afterwards. The lifthawk moves further downboard and drops off APCs and infantry in the Western objective building
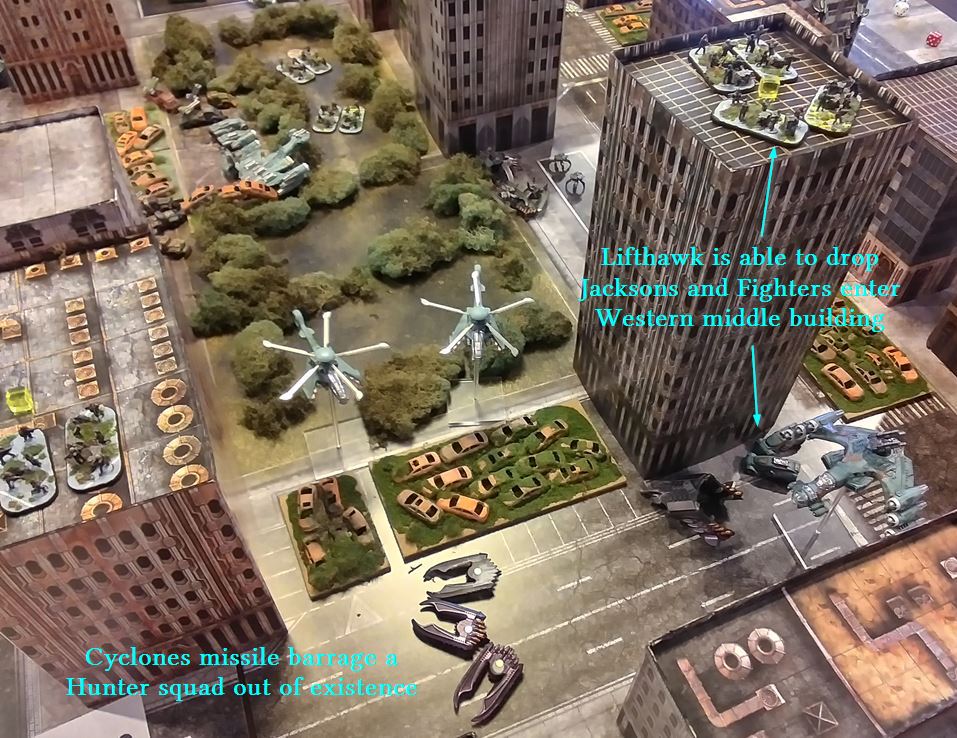
Middle of the board the Destroyers fired from the windows of the central building at the Gun Wagons scrapping one of them; the counterfire wiped out an entire unit of the beasts though.
Turn 4
Turn 4 is successful searches all around with the Scourge able to fully extract theirs via APC into Marauder and off the board. The Jacksons are left to fend for themselves, with almost all the anti-armor gone. The central objective however was still not discovered, and the mid-field Fighters finally broke through the adjoining building to engage the Destroyers for control at the top of Turn 5.
Turn 5
Turn 5 starts with a disastrous Close Quarters Battle, the unit of 3 Destroyers vs 20 Fighters ending 3 to 14. Being outnumbered is the only thing keeping them in the building. At this point, the exact resolution of the game stopped. The Scourge had secured 4 VP, the Resistance were going to be able to score 3VP, and all that mattered was whether the Fighters could wrest the central objective from the Destroyers to tie 4/4, else the game would resolve 5 to 3. So we just skipped to the T6 CQB in the middle, after Resistance reinforcements arrived bringing the fight up to 3 vs 24. When the dice settled 2 Destroyers survived, Morale intact as well as control of the objective, Scourge victorious.
AAR
Destoyers are fantastically durable.
Cyclones are aerial predators.
The pivotal moment in the game was when the Resistance Lifthawk full of troops in the middle of the table was shot down. That really swung the game towards the Scourge, allowing them to extract two objectives unopposed and secure the middle building. If I had payed more attention to spacing, I could have perhaps kept the Lifthawk safe from Reapers, but the dice were rolling hot all game.
We definitely measured something wrong early for the Warriors, but oh well. Still a fun game. This was classic v1.3 rules, and having played with other ruleset more recently, the only parts that really bothered me aren't necessarily CQ, but Search timing and Objective passing. It's a bit too trivial to extract, and rolls being tied to rounds doesn't sit right. Rolls increasing by duration of occupation feels better, as does our homebrew rule for 'Searched' tokens. I don't miss drop'n'shoot, AT ALL. I really can't see what it adds to the game. Dedicated as opposed to open transports really changes how much you risk your transports, and I was in the wrong mindset for it.
Depending on schedules, might be able to run a linked scenario off this one next weekend.